Android Development Kit (ADT)
The Android SDK provides the API libraries and developer tools necessary to build, test, and debug apps for Android. The ADT can be setup using either of the following option:
Option1 (Using the Eclipse IDE preconfigure with the ADT)
- Download the Android SDK from http://developer.android.com/sdk/index.html depending on the architecture of your system
- Unzip the folder adt-bundle-windows-xxx-yyyymmdd
- Open the adt-bundle-windows-xxx-yyyymmdd folder and navigate to …\adt-bundle-windows-x86-20131030\eclipse
- Launch the Android Developer Tools IDE by double clicking on the eclipse.exe
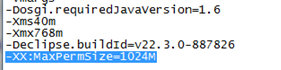
Note: If the following error is encountered while running the Eclipse

Open eclipse.ini in a notepad
![]()
and modify the value of -XX:MaxPermSize=1024M to -XX:MaxPermSize=512M.
If the value 512M does not work out then further reduce the value to 256M i.e. to -XX:MaxPermSize=256M
Option2 (Using the ADT Plugin for Eclipse)
Android offers a custom plugin for the Eclipse IDE, called Android Development Tools (ADT). This plugin provides a powerful, integrated environment in which to develop Android apps.
Download the ADT Plugin
- Start Eclipse, then select Help > Install New Software.
- Click Add, in the top-right corner.
- In the Add Repository dialog that appears, enter “ADT Plugin” for the Name and the following URL for the Location: https://dl-ssl.google.com/android/eclipse/
- Click OK
- If you have trouble acquiring the plugin, try using “http” in the Location URL, instead of “https” (https is preferred for security reasons)
- In the Available Software dialog, select the checkbox next to Developer Tools and click Next.
- In the next window, you’ll see a list of the tools to be downloaded. Click Next.
- Read and accept the license agreements, then click Finish.
- If you get a security warning saying that the authenticity or validity of the software can’t be established, click OK.
- When the installation completes, restart Eclipse.
Configure the ADT Plugin
Once Eclipse restarts, you must specify the location of your Android SDK directory:
- In the “Welcome to Android Development” window that appears, select Use existing SDKs.
- Browse and select the location of the Android SDK directory you recently downloaded and unpacked.
- Click Next.
Launching the Android Emulator
To create an AVD:
- In Eclipse: select Window > Android Virtual Device Manager, or click the AVD Manager icon in the Eclipse toolbar

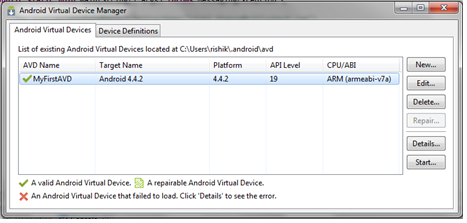
2. Create an AVD by clicking on New button in the Android Virtual Device Manager

3. Fill in the details for the AVD in the Create New AVD dialog appears.

4. Click OK. There will be an entry visible in the Android Virtual Device Manager with the AVD Name as MyFirstAVD

5. Click on the Start.. button after selecting the AVD from the the Android Virtual Device Manager
6. Click on the Launch button in the Launch Options window

7. Wait for the emulator to complete loading

8. Below is the AVD console(MyFirstAVD) listening on Port:5554

Congratulations! The AVD is up and running. It can now be used for testing the mobile apps.
Setting up the Environment Variables
- Right click on Computer in the desktop start menu and select Properties from the resulting menu.
- In the properties panel, select the Advanced System Settings link and, in the resulting dialog, click on the Environment Variables… button.
- In the Environment Variables dialog, locate the Path variable in the System variables list, select it and click on Edit…. Locate the end of the current variable value string and append the path to the android platform tools to the end, using a semicolon to separate the path from the preceding values. For example, assuming the ADT bundle was installed into /Users/demo/adt-bundle-windows-x86_64, the following would be appended to the end of the current Path value:
;C:\Users\demo\adt-bundle-windows-x86_64\sdk\platform-tools;C:\Users\demo\adt-bundle-windows-x86_64\sdk\tools
4. Click on OK in each dialog box and close the system properties control panel.Once the above steps are complete, verify that the path is correctly set by opening a Command Prompt window (Start -> All Programs -> Accessories -> Command Prompt) and at the prompt enter:
echo %Path%adbandroid 'adb' is not recognized as an internal or external command, operable program or batch file.